Load packages
# numerical calculation & data frames import numpy as npimport pandas as pd# visualization import matplotlib.pyplot as pltimport seaborn as snsimport seaborn.objects as so# statistics import statsmodels.api as sm# pandas options 'mode.copy_on_write' , True ) # pandas 2.0 = ' {:.2f} ' .format # pd.reset_option('display.float_format') = 7 # max number of rows to display # NumPy options = 2 , suppress= True ) # suppress scientific notation # For high resolution display import matplotlib_inline"retina" )
Customizing
Scales and layouts
= sns.load_dataset("penguins" )= "body_mass_g" , y= "species" , color= "island" )= "sex" )0.5 ))= "Set2" ) # color palettes: "Set2" = (7 , 5 )) # plot size
= sns.load_dataset("diamonds" )= "carat" , y= "price" , color= "carat" , marker= "cut" )= so.Continuous("crest" , norm= (0 , 3 ), trans= "sqrt" ),
Choosing color palettes
Legends and ticks
= "species" )= so.Nominal(order= ["Adelie" , "Gentoo" , "Chinstrap" ])) # x축의 카테고리 순서를 변경
= "carat" , y= "price" , color= "carat" )= so.Continuous().tick(every= 0.5 ),= so.Continuous().label(like= "$ {x:,.0f} " ), # %표시: like="{x:.1f%}" = so.Continuous().tick(at= [1 , 2 , 3 , 4 ]),
Limits, labels, and titles
Plot has a number of methods for simple customization, including Plot.label(), Plot.limit(), and Plot.share():
= sns.load_dataset("penguins" )= "body_mass_g" , y= "species" , color= "island" )= "sex" )0.5 ))= False )= (2.5 , - 0.5 ))= "Body mass (g)" ,= "" ,= str .capitalize,= " {} penguins" .format ,
Themes
Matplotlib rc parameters을 dictionary로 받음: plt.rcParams.keys()
Seaborn의 style: sns.axes_style(): 링크
Matplotlib의 style: plt.style.library[]
sns.axes_style() # current defaultsns.axes_style("darkgrid")
"darkgrid" )# {'figure.facecolor': 'white', # 'axes.labelcolor': '.15', # 'xtick.direction': 'out', # 'ytick.direction': 'out', # 'xtick.color': '.15', # 'ytick.color': '.15', # 'axes.axisbelow': True, # 'grid.linestyle': '-', # 'text.color': '.15', # 'font.family': ['sans-serif'], # 'font.sans-serif': ['Arial', # 'DejaVu Sans', # 'Liberation Sans', # 'Bitstream Vera Sans', # 'sans-serif'], # 'lines.solid_capstyle': 'round', # 'patch.edgecolor': 'w', # 'patch.force_edgecolor': True, # 'image.cmap': 'rocket', # 'xtick.top': False, # 'ytick.right': False, # 'axes.grid': True, # 'axes.facecolor': '#EAEAF2', # 'axes.edgecolor': 'white', # 'grid.color': 'white', # 'axes.spines.left': True, # 'axes.spines.bottom': True, # 'axes.spines.right': True, # 'axes.spines.top': True, # 'xtick.bottom': False, # 'ytick.left': False}
# ['Solarize_Light2', # '_classic_test_patch', # '_mpl-gallery', # '_mpl-gallery-nogrid', # 'bmh', # 'classic', # 'dark_background', # 'fast', # 'fivethirtyeight', # 'ggplot', # 'grayscale', # 'seaborn-v0_8', # 'seaborn-v0_8-bright', # 'seaborn-v0_8-colorblind', # 'seaborn-v0_8-dark', # 'seaborn-v0_8-dark-palette', # 'seaborn-v0_8-darkgrid', # 'seaborn-v0_8-deep', # 'seaborn-v0_8-muted', # 'seaborn-v0_8-notebook', # 'seaborn-v0_8-paper', # 'seaborn-v0_8-pastel', # 'seaborn-v0_8-poster', # 'seaborn-v0_8-talk', # 'seaborn-v0_8-ticks', # 'seaborn-v0_8-white', # 'seaborn-v0_8-whitegrid', # 'tableau-colorblind10'] 가령, matplotlib의 “seaborn-v0_8-whitegrid” 스타일의 specification을 보면,
"seaborn-v0_8-whitegrid" ]# RcParams({'axes.axisbelow': True, # 'axes.edgecolor': '.8', # 'axes.facecolor': 'white', # 'axes.grid': True, # 'axes.labelcolor': '.15', # 'axes.linewidth': 1.0, # 'figure.facecolor': 'white', # 'font.family': ['sans-serif'], # 'font.sans-serif': ['Arial', # 'Liberation Sans', # 'DejaVu Sans', # 'Bitstream Vera Sans', # 'sans-serif'], # 'grid.color': '.8', # 'grid.linestyle': '-', # 'image.cmap': 'Greys', # 'legend.frameon': False, # 'legend.numpoints': 1, # 'legend.scatterpoints': 1, # 'lines.solid_capstyle': <CapStyle.round: 'round'>, # 'text.color': '.15', # 'xtick.color': '.15', # 'xtick.direction': 'out', # 'xtick.major.size': 0.0, # 'xtick.minor.size': 0.0, # 'ytick.color': '.15', # 'ytick.direction': 'out', # 'ytick.major.size': 0.0, # 'ytick.minor.size': 0.0})
= so.Plot(penguins, x= "body_mass_g" , y= "species" , color= "island" ).add(so.Dot(), so.Jitter(0.5 ))"axes.facecolor" : "white" ,"axes.edgecolor" : "0.8" ,"axes.spines.top" : False ,"axes.spines.right" : False ,
# Seaborn axes_style 중 "whitegrid"를 적용 & grid linestyle도 조정 ** sns.axes_style("whitegrid" ), "grid.linestyle" : ":" })
Seaborn: controlling figure aesthetics
# Matplotlib의 스타일 중 "fivethirtyeight"을 사용 ** plt.style.library["fivethirtyeight" ]})
플랏 단위가 아닌 전체 플랏에 대해 적용 하려면,Plot.config.theme.update()을 사용: 참고 링크
= {** sns.axes_style("whitegrid" ), "grid.linestyle" : ":" }# Reset 하려면
한글 폰트 설정
플랏 별로 적용시: p.theme({"font.family": ["AppleGothic"]})
전체에 적용시: so.Plot.config.theme.update({"font.family": ["AppleGothic"]})
설치 폰트 확인
# matplotlib에 설치된 폰트 확인 import matplotlib.font_manager as fm# 폰트 위치/이름 확인 # 폰트 이름만 추출 sorted ([f.name for f in fm.fontManager.ttflist])# 폰트 이름 중 'Nanum'이 들어간 폰트 확인 for f in fm.fontManager.ttflist if "Nanum" in f.name]
폰트 추가 설치
import matplotlib.font_manager as fmimport matplotlib.pyplot as plt# List에 없는 폰트를 추가하는 방법 = fm.FontEntry(= "/Users/skcho/Library/Fonts/NanumGothic.ttf" , # 폰트 저장 경로 = "NanumGothic" , # 폰트 이름 설정 0 , font_entry) # Matplotlib에 폰트 추가 "font.family" : "NanumGothic" , "axes.unicode_minus" : False }# 폰트 설정 & '-' 문자 깨짐 방지 # 폰트 이름 중 'Nanum'이 들어간 폰트 확인 for f in fm.fontManager.ttflist if "Nanum" in f.name]
= sns.load_dataset("tips" )"day" ] = tips["day" ].map ({"Sun" : "일요일" , "Sat" : "토요일" , "Thur" : "목요일" , "Fri" : "금요일" })= so.Plot(tips, x= "day" , y= "tip" ).add(so.Dots()).label(title= "요일별 받은 팁 금액" , y= "팁 금액" )# 플랏 별로 한글 폰트 설정 "font.family" : ["AppleGothic" ]}) # Windows: "Malgun Gothic"
# 또는 전체에 적용하려면, "font.family" : ["AppleGothic" ]})
Seaborn 플랏에서 흐릿하게 그려지는 경우: 고해상도 디스플레이에 최적화
import matplotlib_inline"retina" )
Custom plots
아래와 같이 sbcustom.py 모듈을 working directory에 저장하거나
sys module을 이용하여 sbcustom.py가 있는 폴더를 sys.path에 추가하거나
import sys'sbcustom.py이 있는 폴더 경로' )패키지 형태로 conda 환경에 install하거나 conda 환경 폴더에 직접 저장할 수도 있음
가령 다음과 같이 python script파일을 만든 후
""" Seaborn.objects statistical plotting custom functions. boxplot, rangeplot """ import seaborn as snsimport seaborn.objects as sodef boxplot(df, x, y, color= None , alpha= 0.1 , marker= "<" ):return (= x, y= y, color= color)= alpha, color= ".6" ), so.Jitter(), so.Dodge())= ("pi" , 50 )), so.Dodge())= 8 , marker= marker), so.Agg("median" ), so.Dodge())= "Dark2" )** sns.axes_style("whitegrid" )})def rangeplot(df, x, y, color= None , alpha= 0.1 , marker= "<" ):return (= x, y= y, color= color)= ("pi" , 50 )), so.Dodge())= 8 , marker= marker), so.Agg("median" ), so.Dodge())= "Dark2" )** sns.axes_style("whitegrid" )})
다음과 같이 import해서 사용
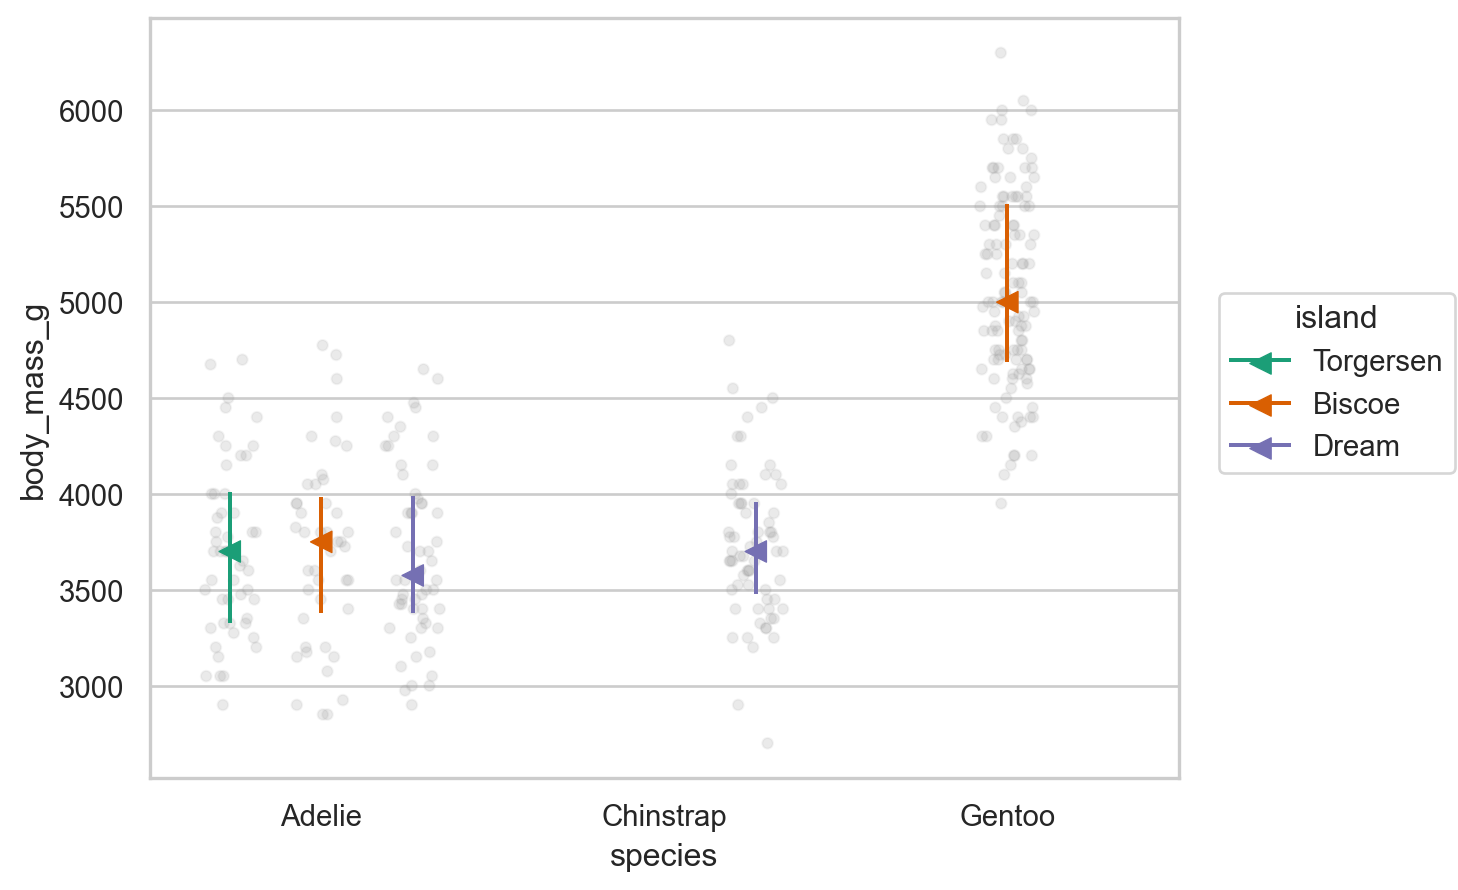
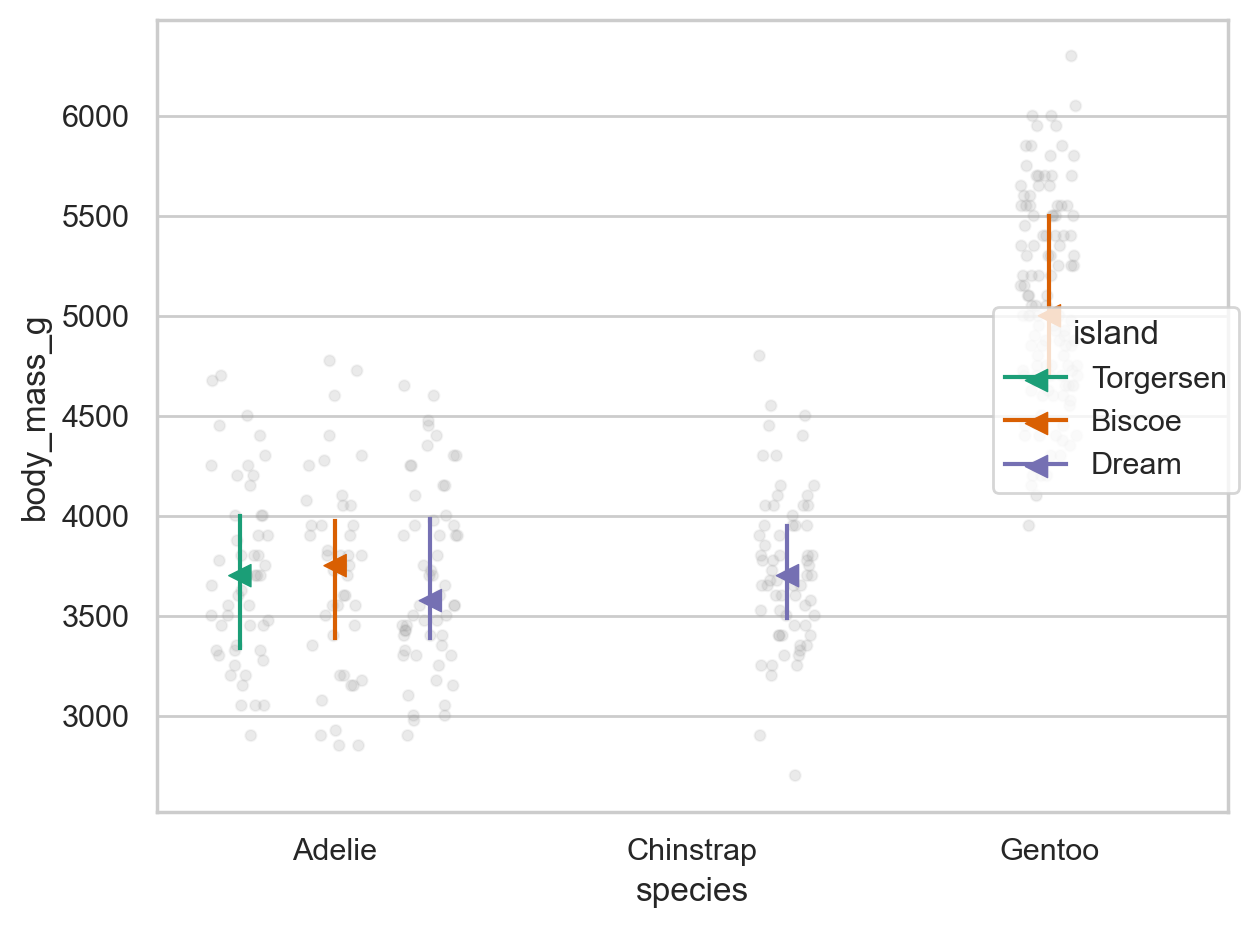
import sbcustom as sbc= "species" , y= "body_mass_g" )# 또는 직접 함수를 호출 from sbcustom import boxplot, rangeplot= "species" , y= "body_mass_g" )= "species" , y= "body_mass_g" , color= "island" )seaborn.object의 함수를 연결해서 쓸 수 있음!
= "species" , y= "body_mass_g" , color= "island" )"species" )= (7.5 , 3.5 ))
Snippets
Snippets: Configure User Snippets
"seaborn.obj" : {"prefix" : "sbj" ,"body" : ["(" ," \t so.Plot($1, x='$2', y='$3')" ," \t .add($0)" ,")" ,"description" : "plot seaborn.objects"
Multiple plots in a Jupyter Notebook
display()를 이용.show()로 pyplot으로 변환
= rangeplot(penguins, x= "species" , y= "body_mass_g" )= boxplot(penguins, x= "species" , y= "body_mass_g" , color= "island" )# jupyter의 output; print()와 같은 역할


